Do you have a blog or website? are you tracking the visitors on regular basis? If not, its time you integrate Google Analytics tool to analyse your website traffic. There are many free and paid tools available in the market. In this article we are focussing on how to integrate Google Analytics with your WordPress blog or website.
Google Analytics is a free tool provided by Google which is used for website analysis and statistics. It works on a small piece of code inserted in your website pages that loads, when a user visits your website the activity gets tracked by the tool. Free option is more sufficient for small scale and mid-sized business but for large scale business or to analysis larger statistics or if you need more in-depth data then you might want to opt for a premium option.
4 Reasons Why Google Analytics is Important For Your Business?
- Calculate Traffic: It can help you track how many visitors visit your site ever day, every week, every month, every year, year on year and it can also help you compare traffic of different months.
- Customer Behavior: Google Analytics can also help you understand your customer behavior, you can track and understand what people do on your website, how much time time they spend on your site, which is the most visited pages on your website.
- Sources: The best part of Google Analytics is the info it provides on the sources of the website visitors. It will tell you how many people directly came on your site organically, how many people came through other websites where your website is listed, how many people came to your site
- Customization Possibilities: Google analytics allow you to customize your goals, customize your reports and customize the display of the results which can help you understand the market better.
I love Google Analytics because every time I visit the website to track results of my website – I get an idea, an idea for my next blog post on the basis of behavior. Google analytics helps you in finding more insights and answers for queries related to your website which will help you in taking a better business decision. It provides enough evidence to understand your business’ digital presence and know are you going in proper direction to bring profit for your investment or taken a wrong direction and wasting your money and time.
Let me make it simpler by asking just five among the many questions about your website for which you can get answer using Google Analytics.
Question 1: Who is currently on your website?
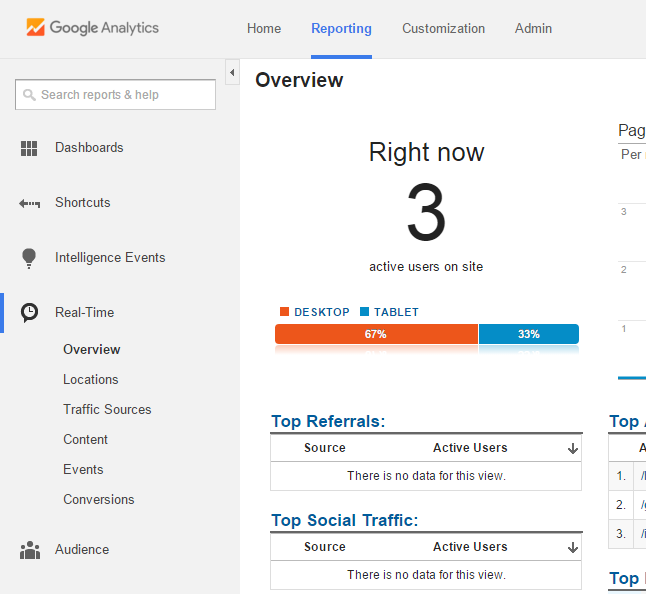
When a user is currently on your website, you will be able to see in Real Time Reports which will give in-depth details of from which location and through which source the user landed on your website.
It is very useful in analyzing which post or campaign is currently performing well by tracking it immediately in Real time.
Question 2: Who is visiting your website?
It is very important to know which type of audience is visiting your website. The Audience Reports in Google analytics gives you the perfect answer in identifying your target audience.
You can track the geographical location of your audience, age, gender, devices, interest and from which browser do they landed on your website. This data will help you in understanding are you targeting the right audience and is your website compatible with user’s devices?
Question 3: How they are getting to your website?
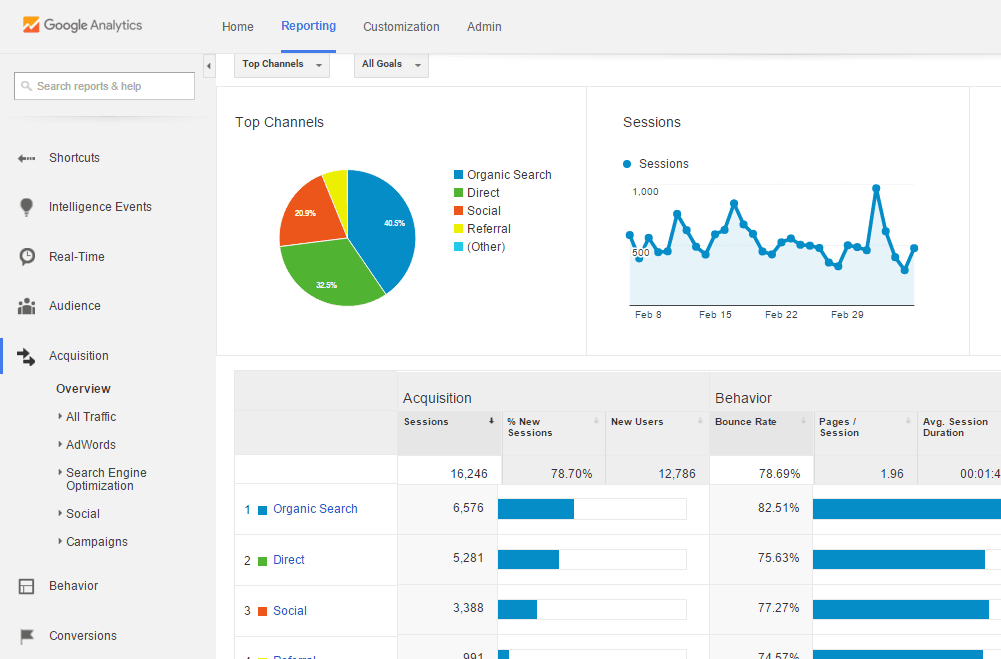
When we are working all possible ways to drive traffic to the website, we need to identify which is working and which is not working. To understand how visitor found you online and landed on your website is very important.
The Acquisition Reports will help you understand through which channels they arrived at your website, which channel is bringing in most of the traffic to your website, which channel drives the traffic that gets converted into sales. By knowing which channel is performing better, you can focus on that channel to make the most out of it and bring in more leads to your business.
Question 4: What they are doing on your website?
Behavior Reports helps to identify how visitors are reacting when they land on your website, does your website and content attract the visitor to stay for long in your website? From which page the user are exiting from your site?
This report give the complete report on visitor’s behavior after they arrive on your site which will help you understand what people really like about your website and which are the areas you need improvements in your site to create better user experience which will help in increasing conversion rate.
Question 5: Have they completed the task which you wanted them to do?
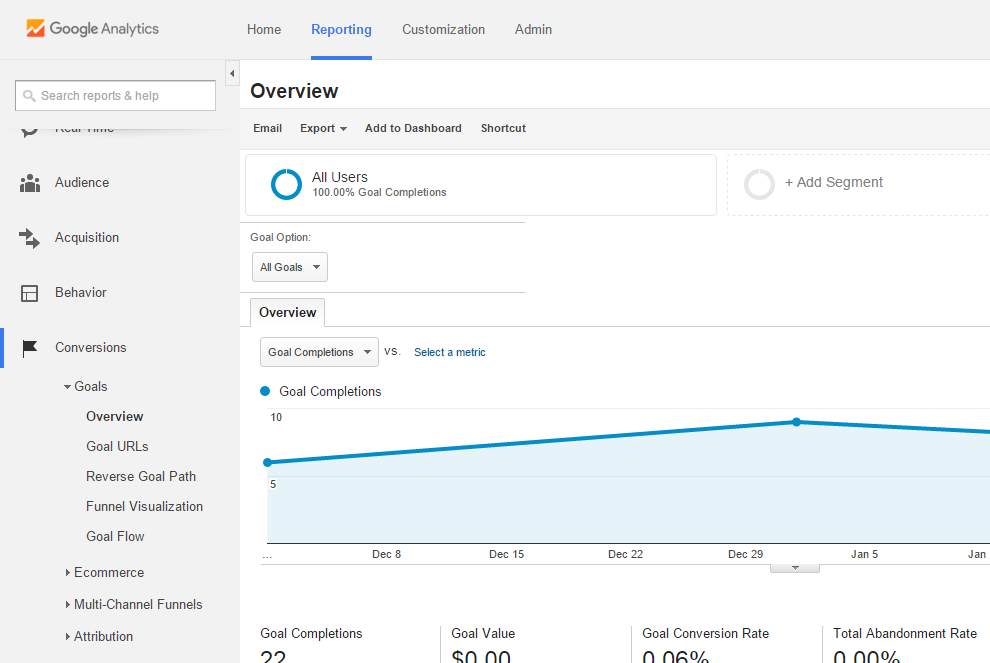
Once the visitor arrives on your website, what do you expect them to do is your goal and how many people did it is taken as conversion. For Example: Subscribing to your blog or buy your products can be your end goal.
Conversion Report gives you the completed details on how people completed your goal and which channel is bring in more conversion and how many conversion you got.
To know more about Goals and how to set up goals: Read How to Setup Goals in Google Analytics
Let’s Get Started:
The basic things you need to get started with Google Analytics:-
- A Gmail account ( if you don’t have a Gmail account, click here to Create your Google account)
- Access to your WordPress blog or website.
Adding Your Website to Google Analytics
Step 1: To create Google Analytics account, go to http://www.google.com/analytics/
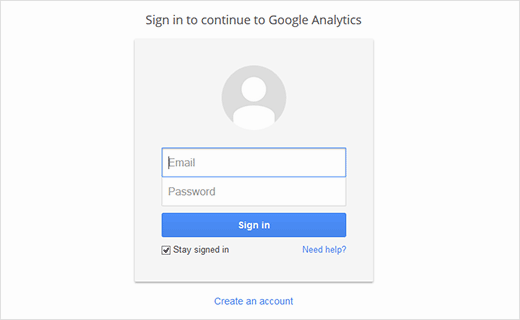
You will be able to see a screen as shown in the below image.
You use Gmail account details to sign in, then you will be taken to Google Analytics Sign Up page as seen in the below image.
if you already have Google analytic account, the when you Login you will take to the dashboard of Google Analytics.
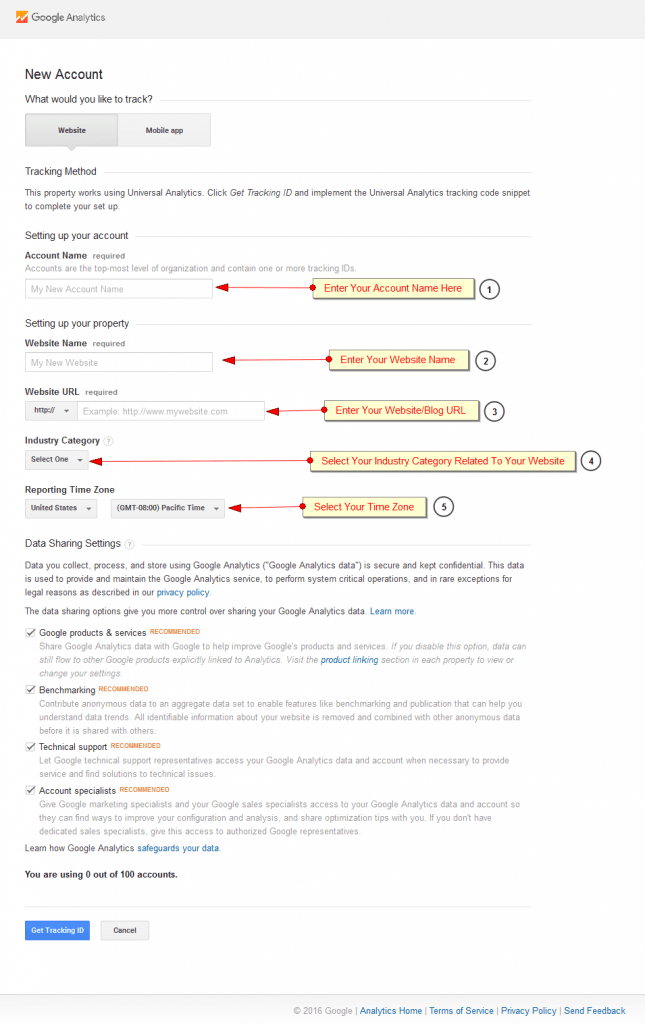
Step 2: After you Sign up, you will be taken to the next page as seen in the below image to start setting up your GA account and get the tracking code for your website. You will be given a choice between website or mobile app. Make sure website is selected.
To start setting up your account, fill the Account Name which will be used as a reference when you manage multiple number of Tracking codes and Accounts.
For setting up your property, you should enter Website Name, Website Url which you want to track and select the industry category relevant to your website and then set the time zone , after filling all the details click on “Get Tracking Id’ Button as shown in the above image.
You will get a Pop Up window about the Terms and conditions – Agreement, you have to select the location to get the respective terms and conditions to your location. Go through it and click on ‘I Accept’ button then you will landed on to a page similar to image shown below which means tracking code has been created for your website.
Now you should be able to see your Google Analytics JavaScript (ga.js) tracking code, as shown in the above image which should be copied and paste in your website to start tracking.
Now you have successfully completed Setting up your ‘Google Analytics’ account and creating the ‘GA Tracking ID’ for your WordPress Blog/Website. Don’t close your Google Analytics Tab as you need to check whether the code we installed is tracking properly on Google Analytics, after installing the code on your WordPress site.
Install Google Analytics in Your Website
There are many ways to install Google analytics in WordPress. We can install it by directly pasting it on the website header file (header.php) of the theme folder of your blog and the easiest method is installing it using plugins.
So let try the easiest method to install it on your WordPress Blog or website. Many plugins are available in the market which can be used. Here, I am picking up one of the best plugins to demonstrate how to install the tracking code.
Step 1: Login into your WordPress Blog/website as an administrator using your admin Username and password
Step 2: Go to ‘Plugin Option’ on the Left side of the dashboard. Click on ‘Add New’ Option
Step 3: In search bar, type ‘SEO Ultimate’ you will find the plugin suggested for your search. Click on ‘Install Now’ button.
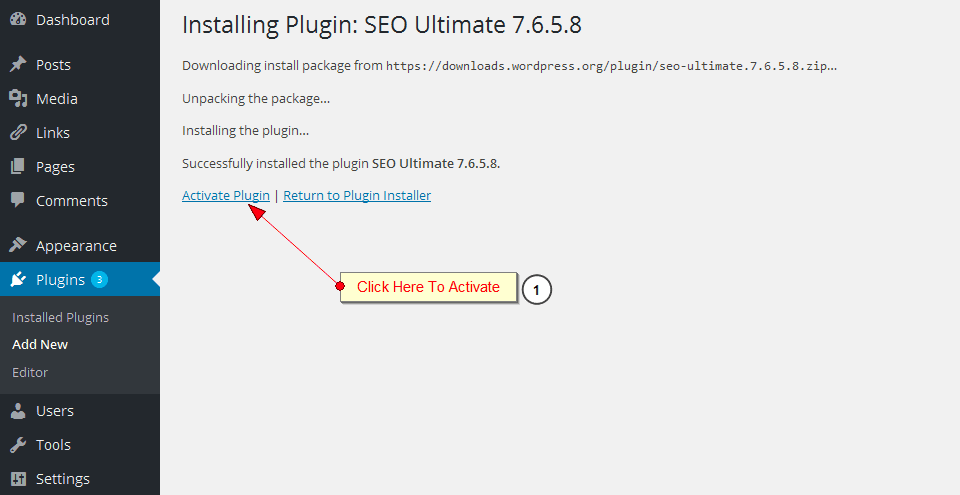
After installing the plugin, you will be taken to the screen as shown below:
Step 4: Click on ‘Activate Plugin’ option to activate your plugin.
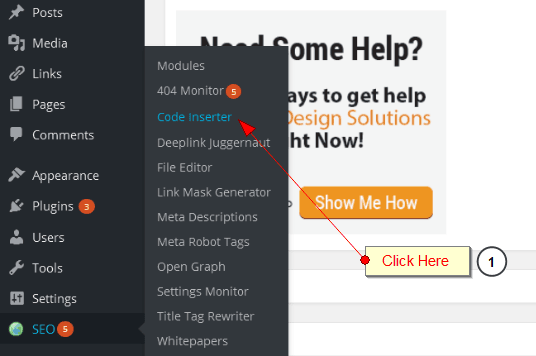
Step 5: After Activation, In the dashboard left side menu bar you will able to see ‘ SEO’ Menu as shown in this picture below
Hover the SEO Menu to check for Code inserter option in this plugin, Click on Code Inserter to insert Google Analytics Tracking code as shown in the image below.
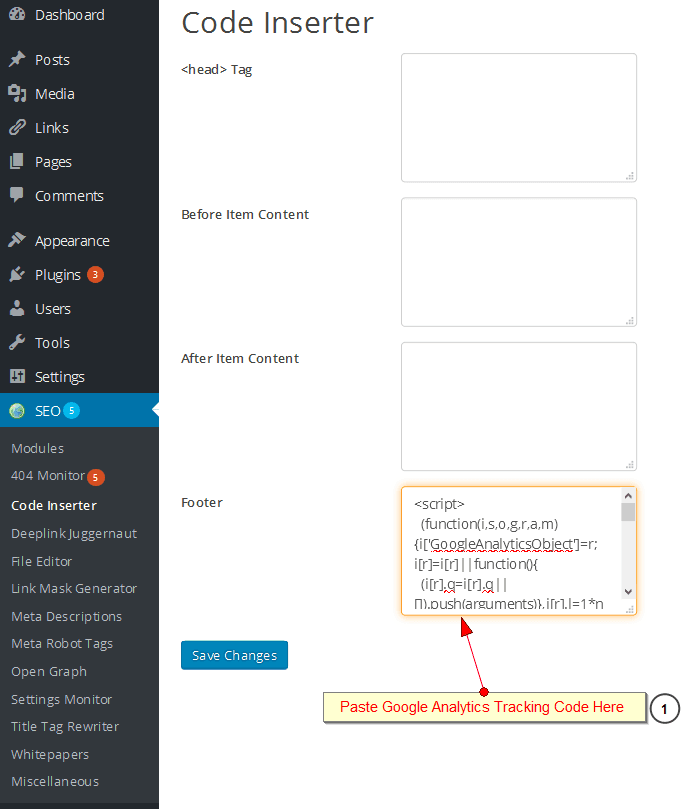
On click, you will be taken to code inserter section which will be have four section as shown in the below image, You can paste the code in any section which will help you insert the tracking code in every page of your website. Here I have pasted the Google Analytics tracking code in footer section.
After pasting the code in the appropriate section, click on ‘Save Changes’ to save it. Now you have successfully inserted the code on the website.
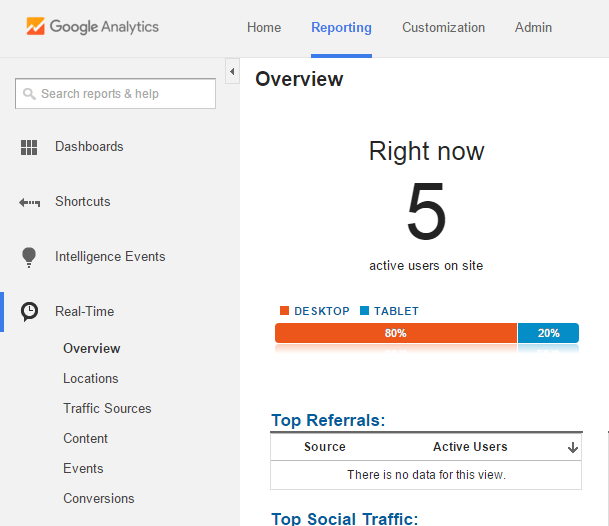
Now we need verify does your tracking code working properly. Open your website or blog on one browser and go back to your Google analytics dashboard and click on Real time -> Overview
If you are able to see a count other than zero in ‘Right Now’ then you have integrate your Google Analytics tracking code successfully.
This article was contributed by Akmela Priya, Digital Marketing Executive, echoVME under the guidance of Mr. Karthikeyan Maruthai, Digital Marketing Head at echoVME and Mr.Sorav Jain


